
Challenge 10 : NRF Registration
In this section, we will examine the network traffic using Wireshark to visualize the NRF registration requests sent by various network functions.
Service Registration
All network functions within the 5G Core must conduct the service registration process prior to becoming a functional core network element. This process is important, particularly in a cloud environment such as the 5G SBA (Service Based Architecture) where network functions will routinely be instantiated and subsequently removed from service on a regular basis.
The NRF (Network Resource Function) is the device which processes service registration requests, ultimately building a database of all the network functions and their associated services. Thereafter, network functions can query the NRF to obtain information on where a particular service or network function can be accessed.
The following figure shows an example of an SMF conducting the Service Registration:
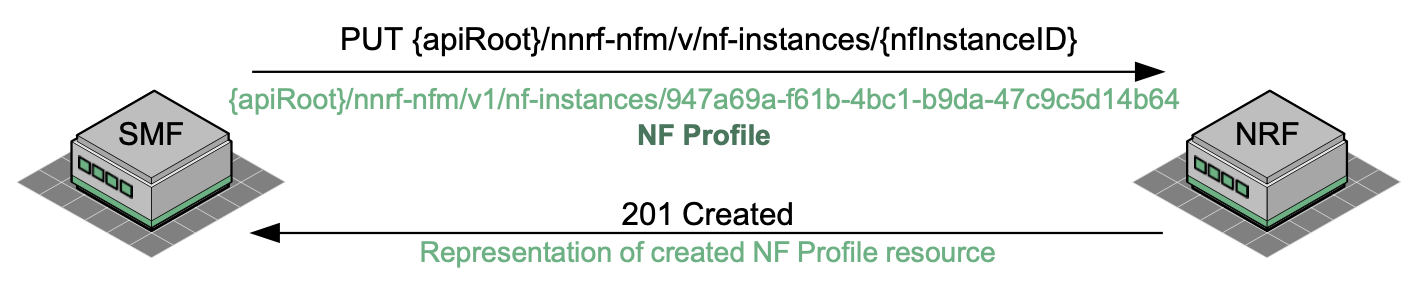
The SMF registers its services by sending a HTTP PUT request to the NRF. The HTTP PUT request contains a URI which will ultimately address the profile information that the SMF is trying to create at the NRF.
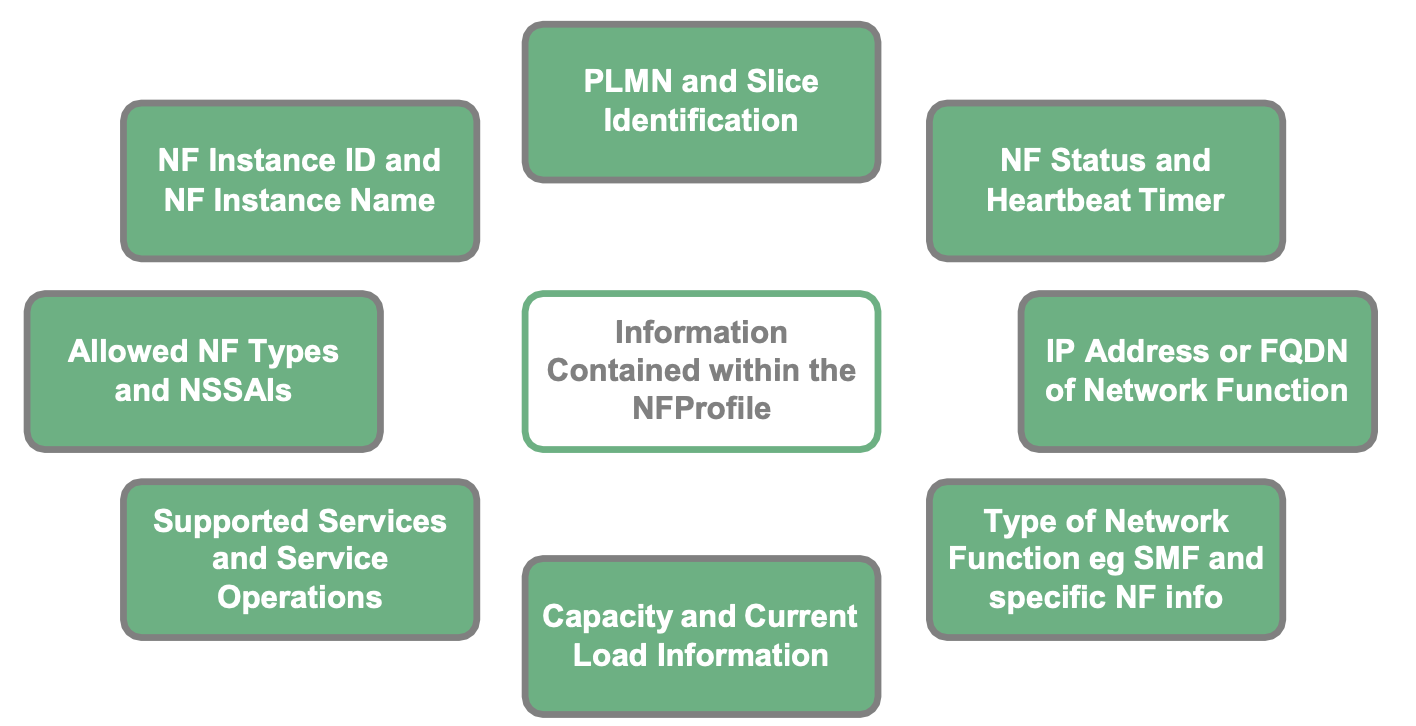
The payload of the HTTP PUT request will contain the NFProfile data structure, which is encoded in JSON format. Information that is held within the NFProfile in the following figure:
Now, let’s observe how this works in practical scenarios.
- Open an SSH terminal and run the command, To stop all nodes:
deactivate-5gc
- Open 2nd SSH terminal and run the command, To capture network traffic:
sudo tcpdump -i any -w ~/captures/nrf_registration.pcap
- Return to the 1st SSH terminal & run:
activate-5gc
Wait until all 5G Core (5gc) nodes are active. Once they are ready, open the second terminal and use the Ctrl+C shortcut to stop capturing network traffic.
- Download the pcap file named nrf_registration.pcap & open it in wireshark.
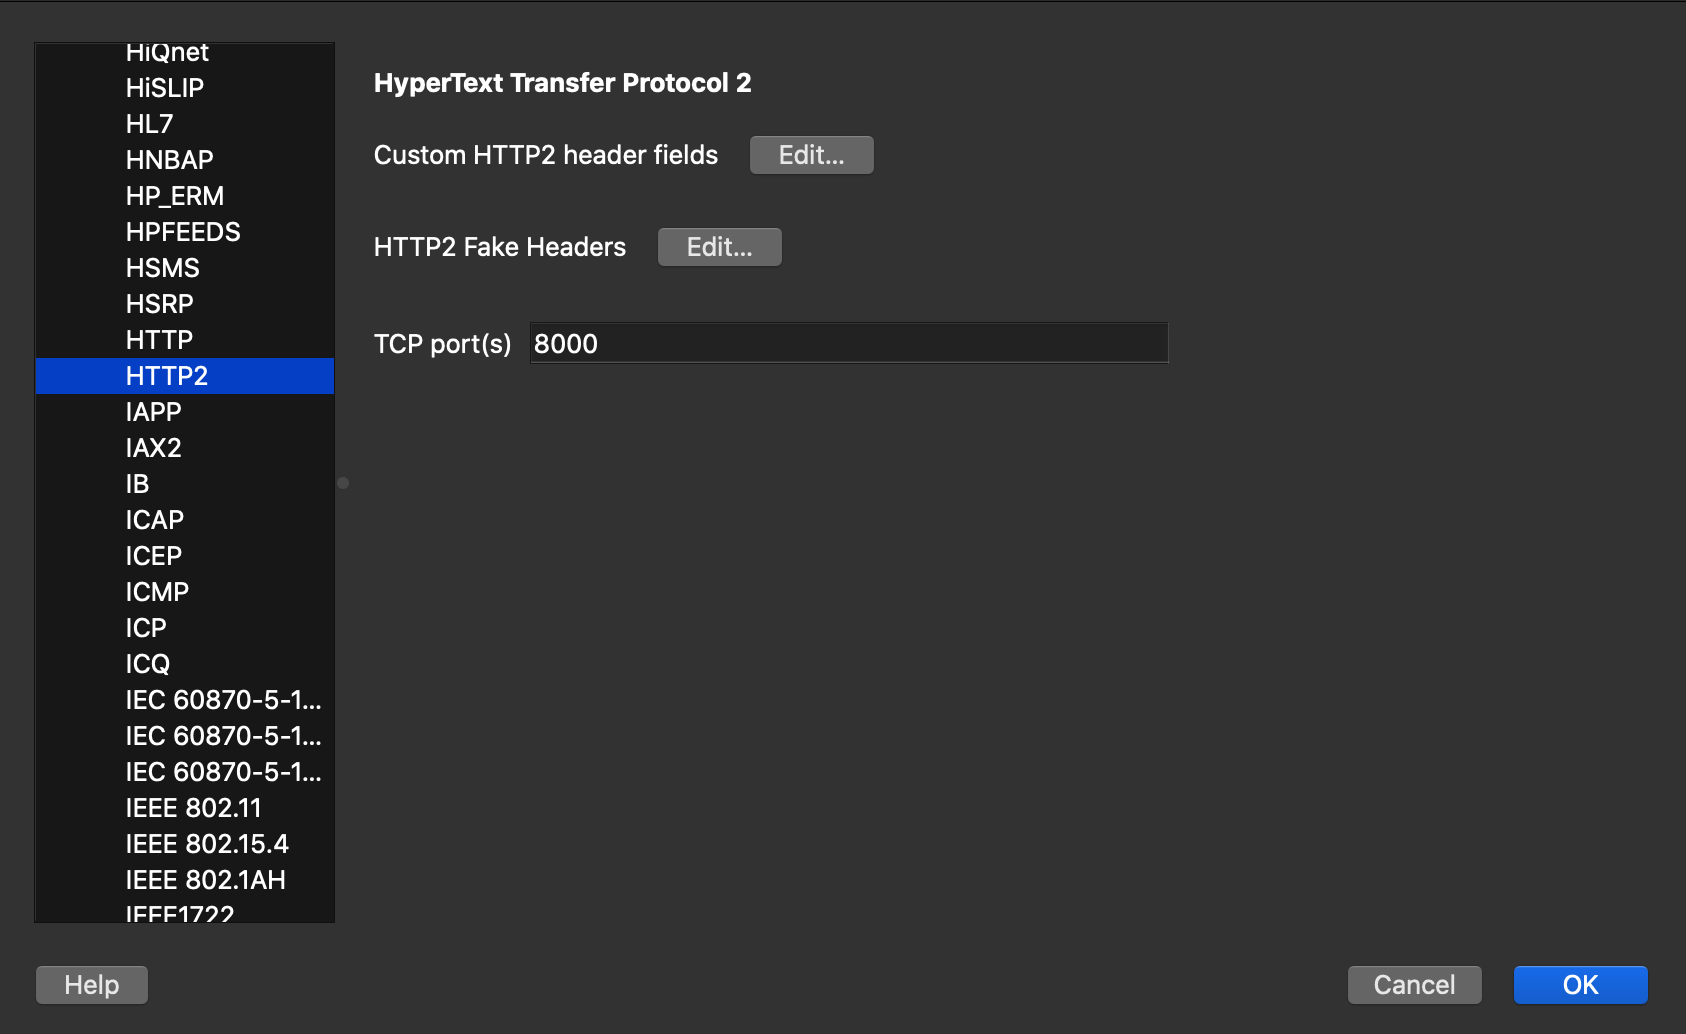
Note: To visualize HTTP/2 traffic in Wireshark, you need to configure Wireshark to interpret TCP traffic on port 8000 as HTTP/2. Follow these steps:
- Go to “Edit” -> “Preferences” -> “Protocols” in Wireshark.
- Find and Select “HTTP2” from the list of protocols.
- In the “HTTP2” settings, change the TCP port to 8000.
- Click “OK” to save the changes.
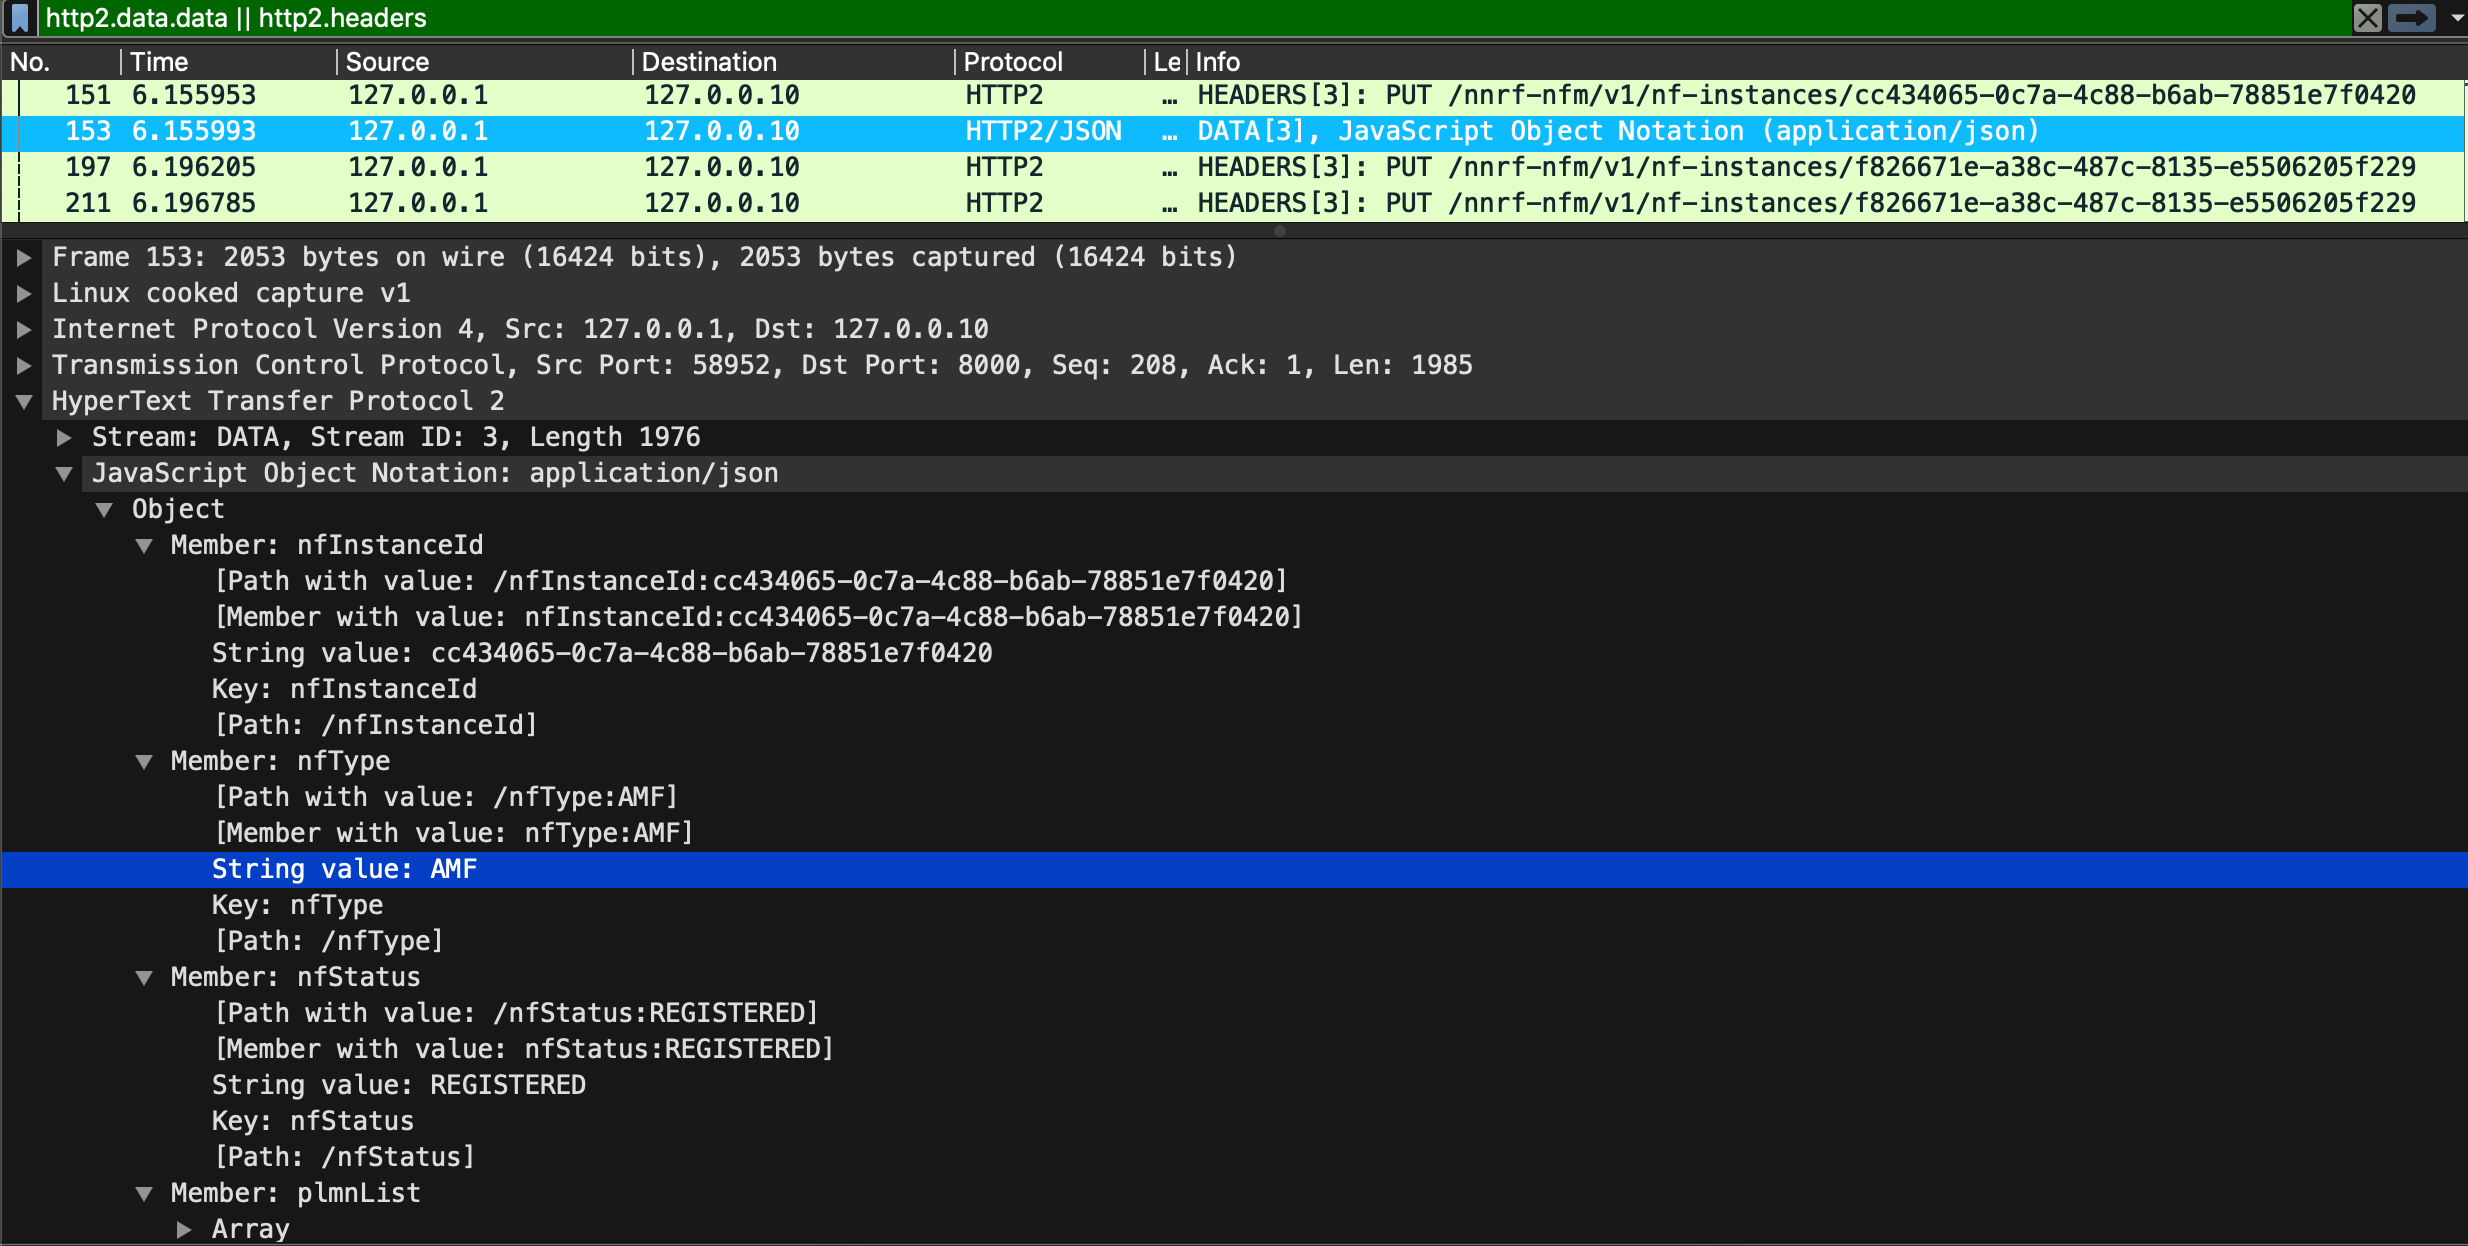
- In wireshark apply the following filter : “http2.headers || http2.data.data”
Within the HTTP/2 body (DATA packets), you will observe various Network Functions (NFs) attempting to register their profiles with the Network Repository Function (NRF).
IP Reminders:
127.0.0.1 ( eth0 ) –> AMF || 127.0.0.10 –> NRF || 127.0.0.1 (eth0) –> SMF
Exemples:
- AMF Registration
- SMF Registration

Note: The reason you see two packets, one for headers and another for data, in HTTP/2 is due to the way HTTP/2 implements multiplexing. Instead of sending complete HTTP requests or responses in a single packet, HTTP/2 breaks them down into smaller units known as frames. These frames are then sent over the same TCP connection.